Brass & Woodwind: Basic care and maintenance | Clarinet & Flute
Jan 30, 2024
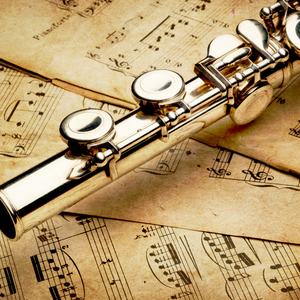
Care for your Flute or Clarinet
Regular cleaning and maintenance of your instrument is important for the instruments’ longevity as well as good instrument hygiene. Follow these simple maintenance and you can keep your instrument playing and looking its best for years.
Basic care and maintenance of a Clarinet
After you finish playing your Clarinet
One of the most important things to do after you finish playing your clarinet is to put the cap one your mouthpiece and remove the mouthpiece. Then you use your pull through to get the moisture out by dropping it through the top and pulling it down the bottom. If you do this every time you finish playing, it will help the longevity of the instrument pads. One thing that pads don’t like is to be put back into the case while still slightly damp. This can cause them to puff-up and eventually crack. If this happens you will need to have them replaced because they will leak air when closed making the instrument hard or even impossible to play.
If the pads start to get sticky, the best thing to use is a cigarette paper. Place it under the pad and blot the pad gently by closing the pad on to the paper. When the pad is wet, take care not to pull the paper as this can tear the pad. Always blot to remove moisture.
Grease the joints
On the clarinet, you have cork joints throughout. You should grease each one so that each section fits together easily. If the joints are too tight, you can twist and bend the keys. Some of the cheaper Chinese instruments’s have very soft keywork so without very careful handling, you will make regular trips to the shop for repairs and adjustments.
Assembling your clarinet safely
Your clarinet has two main central sections . If you hold the ring-key closed, offer up the bottom and join them carefully by twisting the male & female cork joints into position. Do this in such a way that the linkage (with the ring-key on top) goes over the top of the bar at the bottom. If you put it together carelessly and twist it around, some instruments’ configuration of these two parts will clash and bend causing the instrument to have misaligned keys and not work properly. Twist it together carefully so that the two pillars are in line to ensure that the instrument is in the correct alignment.
The right hand rings should close the top rings. If this section of keywork bends, you will need to visit us to get it straightened. The other most regular maladjustment is when the C key gets bent so that when you play the B key, the C key won’t close. This is simply because over a period of time you would have bent the C key which bends what we call the “crow’s foot” beneath and then the two don’t line up. It’s quite easy to bend it back by just putting your thumb underneath and pushing, however, if you overdo this it will only make matters worse so it is probably best to consult an expert.
Cleaning the mouthpiece
If the mouthpiece gets a build-up of calcium deposits, you can soak the beak (tip)( of the mouthpiece in a tub of vinegar for about 5 minutes and the deposit will wash off with some warm soapy water. Remember to pull through afterward otherwise it will taste like fish and chips! That covers the basic maintenance for a clarinet. There is not much else you can do except to play and enjoy!
Tips and advice for basic maintenance of the Flute
We will go through the key areas below.
After playing your Flute
After you finish playing your flute, like the clarinet, the most important thing for the longevity of the pads is to remove any excess moisture by using a pull through. The best thing to use in your case will be the flute cleaning rod. This looks like a giant needle and can be made of wood, plastic or metal. One end of the rod has an eye. If you thread the cleaning cloth through the eye, drop and pull it through and pull it out – this remove most of the residual moisture. Insert the cleaning rod as far as it will go into the head joint, this is sufficient. There’s no need to take the head joint apart. Although there are no pads to deteriorate on the headjoint, its quick & easy to do so get into the habit of drying each section.
Configuration of your Flute
If you look at the top of head joint, you will see a knurled end cap (referred to as the crown). The only function it really has is to tidy up the top of the head joint. What it does do if you twist it clockwise, is withdraw the head joint cork that is positioned in there. It pulls it away from the lip plate hole that lengthens the tube and alters the intonation and production of some of the notes.
On the reverse of the cleaning rod, you can see a little line. When you put the rod inside the head joint the line should be in the centre of the lip plate hole. This means the cork is in the correct position.
Grease the joints?
It is not usually necessary to grease the all metal joints on a flute and grease can attract dirt & grit. Usually just by keeping the joints clean the flute will give you many years of good service. If you find the joints are either too tight or too loose, our engineer can expand the relevant part to make the joints fit perfectly. Don’t force joints or lever them on as this will cause an ovaling effect which can lead to the foot joint falling off!
When assembling your flute
On the foot joint you regularly see that it’s lose and rocking around – simply because you put it together or took it apart rather carelessly. When assembling or disassembling, twist it together and twist it apart in a straight line and not in an angle as this tends to distort the end of the tenon. When this happens, the whole foot joint is rocking around. If this happens, it can easily be rectified by our engineer. Most flutes that come in for repair generally has that part loose. So just remember to twist it in straight and twist it out straight.
A lot of flutes now have marks to indicate where to line the two parts up. If you line up the action rod through the middle of the right hand stack of keys, that is the correct position.
Regular cleaning
Sticky pads can be a problem. Like the clarinet, just clean them with cigarette paper. Again, rather use a blotting action than pulling it out when the pad is wet as this will aggravate and tear the skin on the pad. If you tear the skin the pad will split through to the upholstery which will cause it to leak and it won’t play that well.
Have a look at the follow-up blog post regarding care and maintenance of your saxophone or trumpet.
Handy care kits for your Woodwind instrument
Visit our online accessories shop for a CARE KIT specific to your woodwind instrument.
Music lessons
If you are interested in music lessons for Clarinet or Flute, visit out Music lessons page.
We are based in Bishop’s Stortford and sell, rent and teach guitar, bass, drums, vocals, piano, ukulele, band, saxophone, clarinet and flute. We also offer services to Primary education.